
Tools
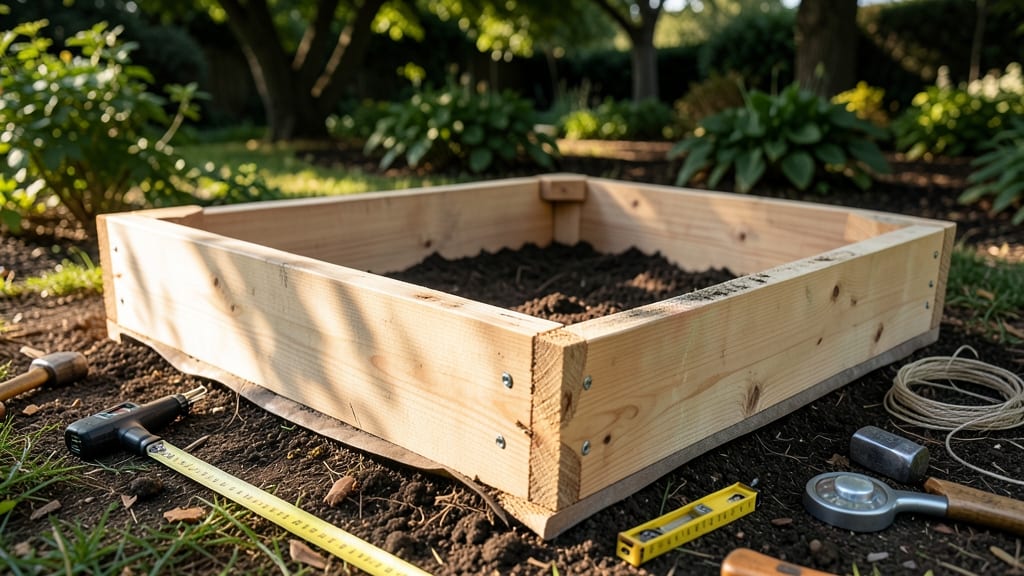
Building a 2x4 raised garden bed with layered plans lets you grow more in less space while controlling soil quality and drainage—perfect for small yards or urban balconies.
Picture this: a 4-foot-by-8-foot bed with built-in tiers, where carrots thrive in deep pockets while lettuce grows in shallow layers. No more wasted space or uneven soil—just a customizable system that adapts to your plants’ needs.
These designs aren’t just practical; they’re a game-changer for year-round planting. Whether you’re working with 6a zone frost dates or limited square footage, layered beds let you rotate crops, extend seasons, and even grow delicate herbs alongside hearty vegetables.
In this guide, I’ll walk you through step-by-step plans for sturdy, long-lasting beds—plus tips on soil prep, drainage tricks, and how to avoid common mistakes that shorten a bed’s lifespan.
How to build a 2x4 raised garden bed with layered depths
A 2x4 raised garden bed with layered depths is my go-to project for maximizing small spaces while creating the perfect environment for different plant types. The layered design allows you to grow shallow-rooted herbs in upper tiers and deeper vegetables like carrots or potatoes in the lower sections.
Plus, the elevated structure improves drainage and reduces weed competition. Whether you're working with a 4x8-foot plot or a compact urban garden, this method adapts to any space.
Before you start, choose between a ground-level foundation (simpler but less elevated) or a full elevated base (better for drainage and accessibility). For this guide, I’ll focus on a 3-tiered design with depths of 6 inches, 12 inches, and 18 inches—ideal for herbs, greens, and root crops.
Gather your materials, tools, and a sunny spot with at least 6 hours of sunlight daily.
Step-by-Step Construction Guide
-
Step 1: Gather Materials
- 10 untreated 2x4 lumber (8-foot lengths)
- 4 corner braces or screws for stability
- 1 bag landscape fabric (to block weeds)
- 2-3 inches of gravel or crushed stone (for drainage)
- Soil mix: Topsoil, compost, and perlite (50/30/20 ratio)
-
Step 2: Cut Lumber to Size
- Bottom layer (18-inch depth): 4 pieces at 48" (width) x 18" (height)
- Middle layer (12-inch depth): 4 pieces at 40" x 12" (adjust for overhang)
- Top layer (6-inch depth): 4 pieces at 32" x 6"
- Side supports: 4 pieces at 24" (height) for stability
-
Step 3: Assemble the Frame
- Lay the bottom layer flat and secure with deck screws or corner braces.
- Attach the middle layer on top, offsetting by 6 inches for depth variation.
- Add the top layer last, ensuring it’s centered and secured tightly.
- Install side supports between layers for extra stability.
-
Step 4: Prepare the Foundation
- For ground-level beds, lay landscape fabric to suppress weeds.
- For elevated beds, add a 2-inch gravel base for drainage.
- Place the assembled frame on the foundation and check for level.
-
Step 5: Fill with Soil Layers
- Bottom layer: Add 6 inches of gravel or coarse soil for drainage.
- Middle layer: Mix in compost and perlite for aeration.
- Top layer: Use finished soil blend (topsoil + compost).
- Leave a 2-inch gap at the top to prevent spillage.
-
Step 6: Plant Strategically
- Top tier (6 inches): Herbs like basil or thyme.
- Middle tier (12 inches): Leafy greens (spinach, lettuce).
- Bottom tier (18 inches): Root veggies (carrots, potatoes).
- Water deeply after planting to settle the soil.
One of my favorite tips for layered raised beds is to add a drip irrigation system along the bottom edge. This ensures even moisture distribution across all tiers without overwatering the top layer.
If you’re in a USDA Zone 6a or colder, consider adding a clear plastic dome over the top tier to extend the growing season for herbs and greens.
For long-term durability, treat the 2x4 lumber with a non-toxic wood preservative like linseed oil or food-safe sealant. Avoid pressure-treated wood if you plan to grow edibles directly in the bed.
I’ve found that cedar or redwood lasts the longest without rotting, but untreated pine works too if you’re patient about replacing boards every few years.
Pro tip: Mark the depth guidelines on the inside of each tier with a permanent marker. This helps you visualize root space and prevents overcrowding. For example, carrots need 12+ inches, while radishes thrive in just 6 inches.
Adjust your planting layout based on these measurements to avoid competition for nutrients.
Once your bed is built, mulch the top with straw or shredded leaves to retain moisture and suppress weeds. This is especially important in the top tier, where herbs and greens dry out faster.
Over the next few weeks, monitor soil moisture—layered beds dry unevenly, so check all depths regularly.
With this design, you’ll enjoy a high-yield garden in minimal space, plus the flexibility to rotate crops seasonally. Start with a small bed if you’re new to layered gardening, then expand as you gain confidence. Happy building!
Best 2x4 raised garden bed designs for small spaces and year-round planting
Small spaces don’t mean small harvests! With 2x4 raised garden bed designs, you can create multi-level growing zones that fit balconies, patios, or tiny yards while maximizing every inch.
These space-saving layouts let you grow herbs, salad greens, and root vegetables side by side—even in USDA Zone 6a where seasons shift quickly.
Layered beds solve two big problems: limited square footage and seasonal limitations. By stacking depths, you can plant shallow-rooted lettuce in upper tiers while deep-rooted carrots thrive below. Plus, the elevated design improves drainage and warms soil faster in spring, giving you earlier harvests and longer fall growing.
| Design Type | Dimensions (LxWxH) | Best For | Seasonal Tip |
|---|---|---|---|
| Tiered Herb & Greens Bed | 4' x 2' x 18" (3 tiers) | Basil, spinach, radishes | Use top tier for fast crops; bottom for deep greens |
| Root Vegetable Pocket Bed | 3' x 3' x 24" (pocketed depths) | Carrots, beets, potatoes | Add sand to pockets for loose soil |
| Companion Planting Box | 2' x 4' x 12" (split levels) | Tomatoes + basil + marigolds | Rotate crops yearly to prevent disease |
| Winter Extension Bed | 4' x 1' x 10" (low profile) | Kale, arugula, chives | Cover with frost cloth for fall/winter |
For urban balconies, opt for the 2x4 tiered herb bed (4' x 2' x 18"). The top tier holds fast-growing basil and radishes, while the middle and bottom layers support spinach and green onions.
This setup ensures year-round greens—even in winter—by swapping out cold-hardy crops like kale when temperatures drop.
If you’re growing root vegetables in limited space, the pocketed design (3' x 3' x 24") is a game-changer. Carve 12-inch-deep pockets into the bed’s sides, filling them with loamy soil mixed with sand for perfect carrot and beet growth.
Place shallow-rooted herbs like chives in the main bed area to maximize every inch.
Don’t overlook companion planting—it’s how I stretch my harvests in small spaces. The 2x4 companion box (2' x 4' x 12") pairs tomatoes with basil (top level) and marigolds (edges) to deter pests naturally.
In fall, replace tomatoes with broccoli or cabbage to extend your growing season until the first frost.
Pro tip: Use seasonal rotation to keep your soil healthy. After harvesting spring lettuce, move to summer peppers, then fall kale. This simple swap prevents soil depletion and disease buildup, giving you three harvests in one bed without replanting the same crops.
With these 2x4 raised garden bed designs, you’ll turn even the smallest space into a high-yield, year-round garden—no wasted soil, no wasted sunlight, just bountiful harvests in every season. Start small, experiment with layers, and watch your green thumb grow! 🌱