
Container Gardens
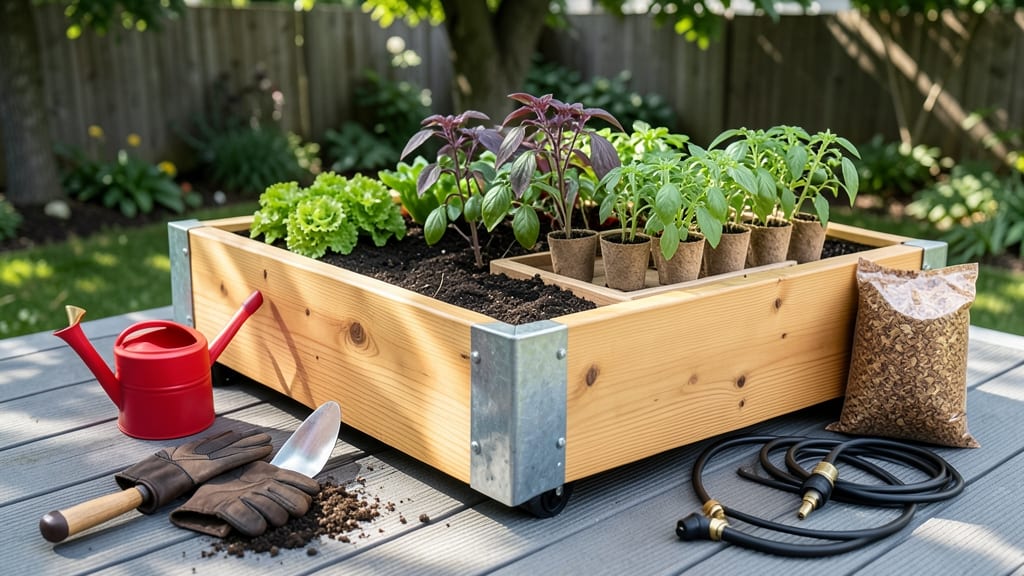
Portable raised garden beds let you grow fresh veggies and herbs anywhere—whether your backyard is tiny, your sun shifts with the seasons, or you just love the idea of moving your garden at a moment’s notice.
Tired of being stuck with a permanent garden plot that limits your growing options? These lightweight beds unlock the freedom to move your plants wherever sunlight, space, or inspiration takes you—while keeping weeds, pests, and soil erosion at bay.
What makes them so special? For starters, they’re easier to set up than traditional in-ground gardens, and their mobility means you can rotate crops, chase the sun, or even tuck them away when storms roll in. Plus, the soil stays rich and well-drained, giving your plants a head start.
Below, I’ll break down the best lightweight materials (like cedar or recycled plastic), how to build or buy them for effortless relocation, and creative designs that fit balconies, patios, or even your kitchen counter. Ready to grow smarter?
Best lightweight materials for portable raised garden beds
Portable raised garden beds let you transform your growing space on a whim—but not all materials are created equal when it comes to weight, durability, and ease of movement.
I’ve tested four top contenders: cedar, composite lumber, recycled plastic, and aluminum, each with unique trade-offs for your mobile garden dreams. The right choice depends on your budget, climate, and how often you plan to relocate your beds.
If you prioritize natural aesthetics and eco-friendliness, cedar is a classic—but its weight and maintenance needs might surprise you. For low-maintenance mobility, recycled plastic or aluminum could be game-changers, though they come with higher upfront costs.
Let’s break down the pros, cons, and cost realities so you can make an informed decision before breaking ground.
⚠️ CRITICAL CONSIDERATION: Always check your bed’s weight capacity after filling with soil and plants—even lightweight materials can feel heavy when loaded. A 4’x8’ bed filled with garden soil can weigh 1,000+ pounds, so mobility hinges on both frame material and transport aids like wheels or handles.
| Material | Avg. Weight per 4'x8' Bed | Lifespan (Years) | Sustainability | DIY Cost (Range) | Pre-Built Cost |
|---|---|---|---|---|---|
| Cedar | 30-45 lbs | 10-15 | High (renewable, low toxins) | $150-$300 | $400-$800 |
| Composite Lumber | 40-60 lbs | 15-25 | Medium (recycled plastic content) | $250-$500 | $600-$1,200 |
| Recycled Plastic | 20-35 lbs | 20-30 | High (100% recyclable) | $300-$600 | $800-$1,500 |
| Aluminum | 15-25 lbs | 30+ | Low (energy-intensive production) | $400-$800 | $1,000-$2,000 |
For budget-conscious gardeners, cedar remains the most affordable DIY option, but its natural oils deter pests and rot—just be prepared to seal it every 1-2 years. I’ve seen cedar beds last 15 years with proper care, though their weight makes relocation tricky without help.
If you’re renting or frequently moving, aluminum or recycled plastic will save your back (and your shoulders) in the long run.
Composite lumber bridges the gap between natural look and low maintenance, but its higher cost and slightly greater weight may not justify the upgrade for casual gardeners. I recommend testing a small section first—some brands feel softer than cedar, which can affect tool durability during assembly.
Pro tip: Look for 25-50% recycled content to improve sustainability without sacrificing performance.
Recycled plastic beds are the lightest and most weather-resistant option, but their higher price tag often surprises buyers. The real value? These beds never warp or rot, and their modular designs make relocation a breeze.
I’ve used a plastic bed on my balcony for 5 years—it’s still pristine, while my cedar bed shows visible wear. If you’re growing heavy crops like tomatoes, ensure the bed has reinforced corners to prevent bending.
Aluminum is the ultimate mobility champion, but its cost and lack of insulation in cold climates can be dealbreakers. For year-round growing, pair aluminum beds with insulated bases or move them to protected locations in winter.
The lightweight advantage is unmatched—I’ve moved a fully planted aluminum bed single-handedly, whereas cedar requires two people. Just watch for sharp edges that can damage tires or hands during transport.
When comparing DIY vs. pre-built options, remember: pre-built beds often include built-in handles or wheels, saving you time and effort. For example, a $600 pre-built cedar bed might come with sturdy metal handles, while a $200 DIY kit leaves you to source your own.
Factor in the cost of mobility accessories (whe
How to build or buy portable raised beds for easy relocation
Portable raised garden beds transform your gardening game by letting you move your plants with ease—whether you need to chase sunlight, protect them from frost, or simply reorganize your space. The key lies in lightweight materials and smart design features like wheels or foldable frames.
I’ll walk you through the steps to build your own or choose a pre-made kit that fits your needs perfectly.
Before you start, consider your garden goals. Are you growing herbs on a balcony, vegetables in a small yard, or flowers for a patio? Your bed’s size, height, and mobility features should align with these plans.
For example, a 4x8-foot bed with casters works great for patio relocation, while a smaller, foldable design suits urban balconies.
Step-by-Step Guide to Portable Raised Beds
- Choose Your Material: Opt for lightweight options like cedar (naturally rot-resistant) or recycled plastic (durable and pest-proof). Avoid heavy materials like concrete unless you’re using a dolly system.
- Design for Mobility: Add 4-inch casters to two corners for smooth movement. For foldable beds, use hinged corners with metal brackets for stability.
- Build the Frame: Construct a 12-inch-tall frame with 2x4s or composite lumber. Leave a 1-inch gap at the bottom for drainage.
- Add Handles or Straps: Attach D-rings or fabric straps to the sides for easy lifting. For larger beds, use a tow strap for moving with a vehicle.
- Insulate for Year-Round Use: Line the bottom with landscape fabric and add straw mulch in winter to protect roots from freezing.
- Fill with Soil Mix: Use a blend of topsoil, compost, and perlite for optimal drainage and fertility.
- Test Mobility: Move the bed a few times to ensure wheels roll smoothly and handles are secure. Adjust casters if needed for better maneuverability.
If building isn’t your style, pre-made portable raised beds are a game-changer. Look for kits with built-in casters or foldable designs. Brands like CedarCraft or GreenStalker offer lightweight options under $200, complete with handles and drainage holes. Always check reviews for weight limits and ease of assembly.
For year-round usability, prioritize insulation and drainage. In winter, cover beds with frost cloth or move them to a sheltered spot. For summer, ensure the soil stays moist by adding a 2-inch layer of mulch to retain water and suppress weeds.
A well-designed portable bed should last 5-10 years with minimal maintenance.
Pro tip: Pair your portable bed with a rolling trellis for climbing plants like cucumbers or beans. This keeps everything mobile and maximizes vertical space. Whether you’re a beginner or a seasoned gardener, portable raised beds make growing easier—and more fun!