
Fertilization
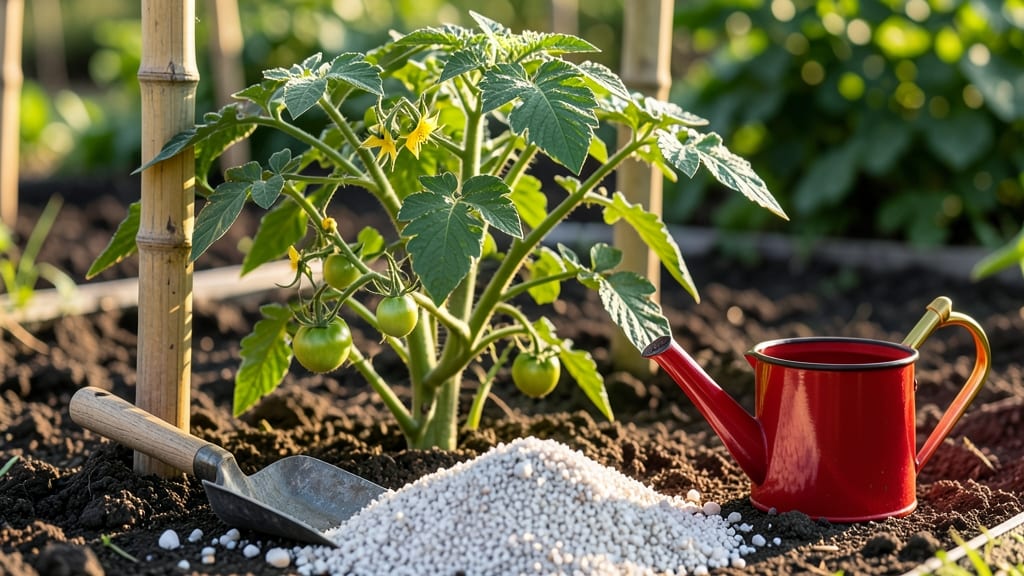
Garden tomatoes need calcium to prevent blossom-end rot and keep your harvest healthy 🍅 — without enough, your fruit develops those ugly sunken spots and falls off before ripening.
If your garden tomatoes are developing the telltale black, sunken spots of blossom end rot, calcium deficiency could be the silent culprit — yet the fix is simpler than you think. This common problem isn’t just about ugly fruit; it slashes your yield and wastes months of effort.
Calcium strengthens cell walls, and when your soil lacks it, your tomatoes can’t transport it fast enough during rapid growth. The good news? You can reverse the damage in just 7 days with the right approach, using organic or synthetic sources like eggshells, gypsum, or foliar sprays.
Below, I break down the best calcium sources, how to apply them, and the step-by-step plan to stop rot and save your crop — no chemistry degree required.
Why calcium deficiency causes blossom end rot in tomatoes
When your tomato plants develop blossom end rot—those unsightly black, sunken patches on the bottom of fruit—calcium deficiency is almost always the culprit. This isn't just a cosmetic issue; it directly impacts your harvest by causing fruit to drop prematurely or develop internal rot.
The problem stems from calcium's critical role in cell wall integrity, and when your plants can't access enough, the results are visible almost immediately.
Calcium acts like a structural glue for plant cells, particularly in rapidly growing areas like tomato fruit. During fruit development, calcium demand skyrockets, but if your soil can't supply it fast enough, the youngest cells—those at the blossom end—suffer first.
This isn't just about soil calcium levels; it's also about how well your plants can transport and utilize what's available. Environmental factors like soil pH, temperature fluctuations, and inconsistent moisture can block this process entirely.
| Symptom | Root Cause | Calcium Role | Quick Fix |
|---|---|---|---|
| Black bottoms on fruit | Poor calcium transport during rapid growth | Cell wall stabilization | Apply calcium spray + mulch |
| Cracked fruit walls | Water stress + calcium imbalance | Structural support | Drip irrigation + calcium supplement |
| Stunted new growth | Root zone calcium depletion | Enzyme activation | Soil amendment (gypsum/limestone) |
The connection between calcium deficiency and blossom end rot becomes clearer when you understand how calcium moves through your tomato plants. Unlike mobile nutrients like nitrogen, calcium can't be reallocated from older to younger tissues.
If the roots can't absorb enough during critical growth phases, the blossom end—the last part to develop—shows the first signs of collapse. This is why even plants growing in calcium-rich soil can suffer if their roots struggle to access it due to compacted soil or poor root development.
Environmental stress plays a massive role in worsening calcium deficiency. For example, soil pH below 6.0 or above 7.5 locks calcium out of root uptake, while temperature extremes—especially above 90°F (32°C)—disrupt calcium movement within the plant.
Even inconsistent watering, like deep watering followed by drought, creates a calcium transport bottleneck. The roots can't keep up with the plant's demand, leaving the blossom end vulnerable to rot.
Another critical factor is how rapid growth strains calcium resources. When tomato plants produce an abundance of fruit in a short period, they outpace calcium availability.
This is why over-fertilizing with nitrogen (which promotes leafy growth) often triggers blossom end rot—more leaves mean more demand, but the roots can't supply enough calcium to support the sudden fruit load. The result? Your beautiful tomato plants may look lush, but their fruit develops unsightly rot within days.
Don't overlook the role of soil structure in calcium availability. Heavy clay soils or compacted garden beds restrict root growth, limiting a plant's ability to forage for calcium. Even if your soil tests show adequate calcium levels, poor root development means your tomatoes can't access it efficiently.
This is why amending soil with organic matter—like compost or well-rotted manure—isn't just about nutrients; it's about creating an environment where roots can explore and absorb calcium effectively.
One of the most common misconceptions is that calcium deficiency only affects the fruit. In reality, it can also cause weak stems, blossom drop, and even leaf curl.
These symptoms often appear before the classic blossom end rot, serving as early warning signs that your plants are struggling with calcium uptake. By the time you see the black spots on your tomatoes, the problem has likely been brewing for weeks, making prevention the best strategy.
To prevent calcium deficiency, focus on consistent moisture—watering deeply but evenly to avoid fluctuations that disrupt calcium transport. Mulching helps maintain stable soil temperatures and moisture levels, while balanced fertilization (with adequate calcium) ensures your plants have the resources they need without overloading on nitrogen.
For existing problems, combining soil amendments (like gypsum) with foliar calcium sprays can provide immediate relief while you work on long-term soil health.
Remember, calcium isn't just about fixing a problem—it's about preventing one before it starts. By understanding how your tomato plants use calcium and what environmental factors can disrupt this process, you'll be equipped to grow healthier, more productive plants with fewer issues.
The next time you see those telltale black spots, you'll know exactly what's happening—and how to stop it in its tracks.
Best calcium sources and application methods for tomatoes
When your tomatoes show signs of blossom-end rot, the first step is choosing the right calcium source. Organic options like eggshells or crushed oyster shell are budget-friendly and eco-friendly, while synthetic options like calcium nitrate deliver faster results.
Each method has trade-offs, so let’s compare them to help you pick the best fit for your garden.
For pre-planting preparation, I recommend gypsum or pelletized chicken manure—both improve soil structure while adding calcium. These work best when mixed into the soil 4-6 weeks before planting to allow time for breakdown.
If you’re dealing with an active rot issue, though, you’ll need a faster solution like a foliar spray or soil drench.
🌱
🌱 Organic vs. Synthetic Calcium Sources
Eggshells (DIY)
- Free/cheap
- Slow-release organic
- Improves soil structure
- Slow activation (4+ weeks)
- Requires preparation (baking/grinding)
Crushed Oyster Shell
- Long-lasting (1-2 years)
- Raises soil pH gently
- No risk of over-application
- Slower uptake than synthetic
- Hard to find in some areas
Calcium Nitrate (Synthetic)
- Fast absorption (24-48 hours)
- Dual calcium + nitrogen boost
- Works in foliar sprays
- Higher cost
- Risk of over-fertilization
Gypsum (Calcium Sulfate)
- Improves soil texture
- Doesn’t alter pH
- Budget-friendly
- Slower release than nitrate
- Less effective in very dry soil
For foliar sprays, I swear by calcium chloride—it’s absorbed quickly through leaves, making it ideal for emergency treatments. Mix 1 teaspoon per gallon of water and spray early in the morning to avoid leaf burn.
This method is best for active rot prevention during flowering and fruiting stages.
If you’re working with container-grown tomatoes, a soil drench of calcium nitrate (1 tablespoon per gallon) every 2 weeks keeps calcium levels steady. For in-ground plants, gypsum worked into the soil at planting time provides a long-term calcium reserve.
My top pick for cost-effectiveness? Crushed oyster shell—it’s a one-time investment that pays off for years, especially in sandy or acidic soils. But if you need fast results, calcium nitrate is the way to go, even if it costs a bit more.
🌿