
Fertilization
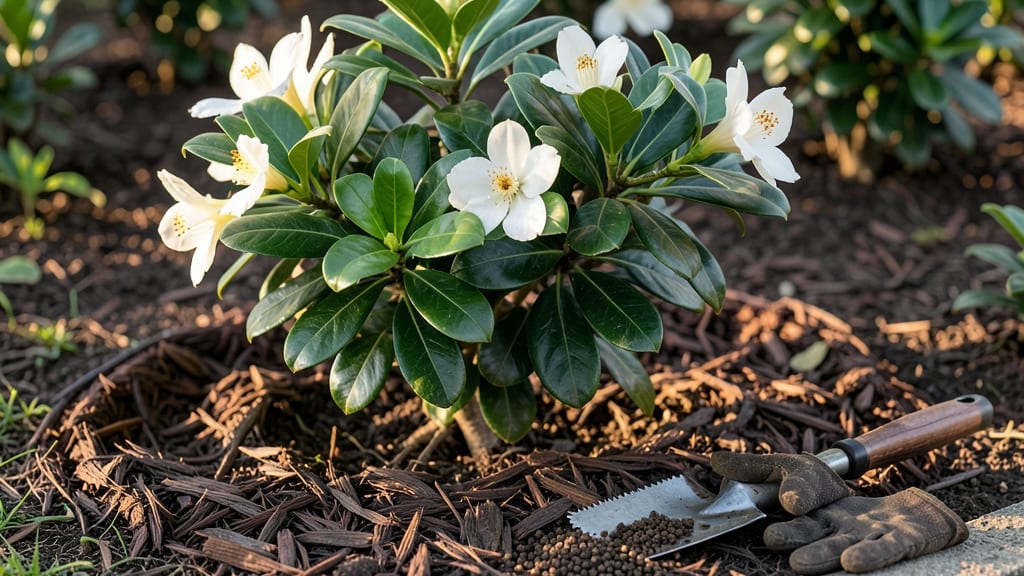
A natural fertilizer for gardenias—like coffee grounds and eggshells—gives these acid-loving plants the boost they need for vibrant blooms without harsh chemicals.
Your gardenias are struggling to bloom? The secret might be hiding in your kitchen and coffee mug—natural fertilizers like coffee grounds and eggshells can transform your acid-loving plants into vibrant, fragrant showstoppers without harsh chemicals.
Most gardeners reach for synthetic fertilizers, but these organic alternatives work just as well—and often better—by mimicking the plant’s natural soil conditions. Coffee grounds lower pH, while crushed eggshells add calcium, creating the perfect balance for healthy growth.
In this guide, I’ll walk you through the exact mix to use, when to apply it, and how to avoid common mistakes that can harm your 🌸 gardenias instead of helping them thrive.
Why gardenias thrive with coffee grounds & eggshell fertilizer mix
If your gardenias are throwing yellow leaves or refusing to bloom, the problem might be a simple nutrient deficiency. Gardenias are acid-loving plants that crave specific nutrients like nitrogen, calcium, and trace minerals—all of which can be found in your kitchen and coffee mug!
The magic combo of coffee grounds and eggshells isn't just a gardening hack; it's a science-backed solution to revive struggling plants.
Coffee grounds lower soil pH, mimicking the acidic conditions gardenias thrive in (pH 5.0–6.5), while eggshells provide calcium and magnesium that prevent leaf yellowing and promote robust blooms. Together, they create a slow-release nutrient powerhouse that outperforms synthetic fertilizers by improving soil structure and microbial activity.
🌱 Did You Know? Gardenias are part of the Rubiaceae family, which includes coffee plants—another clue that coffee grounds are a natural fit for their nutritional needs. This connection means the nitrogen and organic matter in coffee grounds directly support their growth patterns.
Here’s how these two ingredients tackle common gardenia problems:
| Nutrient Source | Key Benefit | Fixes Gardenia Issue | Application Tip |
|---|---|---|---|
| Coffee Grounds | Lowers pH, adds nitrogen | Yellowing leaves, poor blooms | Sprinkle ½ cup around base monthly |
| Eggshells | Calcium, magnesium, slow-release | Leaf curl, weak stems | Crush and mix into soil every 2 months |
| Combined Mix | Balanced pH + nutrients | Stunted growth, sparse flowers | Layer 1 inch of mix annually in spring |
The nitrogen in coffee grounds fuels leafy growth, while the calcium from eggshells strengthens cell walls—preventing the brown edges and leaf drop that plague gardenias. This combo also introduces beneficial microbes that break down organic matter, making nutrients more accessible to roots.
Think of it as a two-step nutrient boost: one for acidity, one for structure.
Gardenias often suffer from chlorosis (yellowing between veins) when soil pH rises above 6.5. Coffee grounds act like a natural pH regulator, keeping conditions ideal for iron and manganese uptake—two minerals critical for chlorophyll production.
Without them, even healthy-looking leaves can’t photosynthesize efficiently, leading to weak growth and fewer blooms.
Eggshells, on the other hand, address calcium deficiencies that cause blossom end rot (a common but overlooked issue in gardenias). The slow release of calcium from crushed shells ensures steady availability, unlike synthetic fertilizers that can cause nutrient spikes and root burn.
This gentle approach mirrors how nutrients are naturally released in forest floor ecosystems, where gardenias originally thrived.
For container gardenias, this mix is especially valuable because potted soil often lacks the organic matter and microbes found in garden beds. The coffee-eggshell combo not only feeds the plant but also improves soil aeration and moisture retention—critical for roots confined to pots.
Just remember: balance is key. Too much coffee grounds can make soil too acidic, while overdoing eggshells may raise pH unexpectedly.
Start with a 1:1 ratio of used coffee grounds to crushed eggshells, mixed into the top 2 inches of soil. Water thoroughly to activate the nutrients, and watch your gardenias respond within 4–6 weeks with deeper green leaves and more abundant blooms.
The best part? This fertilizer is free, zero-waste, and safer for pets and wildlife than chemical alternatives.
🌿 Pro Tip: Save your coffee grounds in a sealed container in the freezer to prevent mold, and rinse eggshells before crushing to remove any salty residue that could harm plants.
Step-by-step guide: how to make and apply your DIY gardenia fertilizer
Transforming your gardenia into a blooming beauty starts with a simple DIY fertilizer made from items you already have at home. This coffee grounds and eggshell mix provides the perfect balance of acidity and calcium—two nutrients gardenias crave but often lack in standard soil.
Unlike synthetic fertilizers, this organic blend feeds your plants slowly while improving soil structure over time.
The best part? You can whip up this natural fertilizer in under 10 minutes using just two ingredients. We’ll cover the exact ratios, application methods, and seasonal timing to ensure your gardenias thrive without risking over-fertilization or nutrient burn.
Let’s get started with the step-by-step process that’s worked for gardeners in USDA Zone 6a and beyond.
Use used coffee grounds (not instant) and crushed eggshells. You’ll need 1 part coffee grounds to 2 parts eggshells by volume.
Bake clean eggshells at 200°F (93°C) for 10 minutes to sterilize, then crush into a fine powder using a mortar and pestle or blender.
Combine 1 cup coffee grounds with 2 cups crushed eggshells. Store in a sealed container until ready to use.
Sprinkle 1 tablespoon of the mix around the base of each gardenia, keeping it 2 inches away from the stem. Gently work it into the top 1-2 inches of soil.
Water the soil until it’s deeply moist to activate the nutrients. Apply in the early morning to prevent fungal growth.
Apply the mix every 4-6 weeks during the growing season (April-September). Skip applications in winter (November-March) when gardenias are dormant.
Watch for darker green leaves, more blooms, and fewer yellowing leaves within 4-6 weeks. Adjust frequency if you notice leaf burn or wilting.
Timing is everything when it comes to fertilizing gardenias. Apply this DIY mix in early spring (March-April) to kickstart growth and again in late summer (August-September) to prepare for the next blooming cycle.
Avoid fertilizing in fall or winter, as gardenias need a rest period to conserve energy for spring blooms.
If your gardenias show signs of over-fertilization, like crispy leaf edges or stunted growth, flush the soil with water 3 times over a week to leach excess nutrients. For under-fertilization, increase the frequency to every 3-4 weeks and pair with a light compost top-dressing for extra nutrients.
With this simple natural fertilizer, your gardenias will reward you with fragrant blooms and lush foliage—all while keeping your soil healthy and chemical-free. Happy gardening! 🌸