
Tools
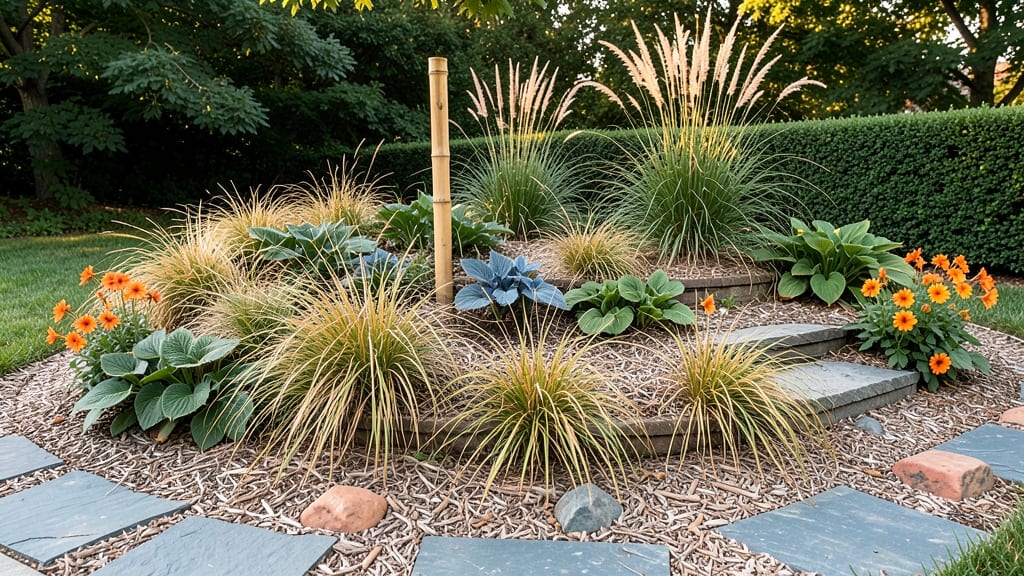
Creating mound garden bed ideas can turn even the smallest yard into a thriving, space-efficient oasis that’s easier on your back and better for drainage.
Picture this: no more bending over to plant or harvest, no more soggy soil after heavy rains, and a garden that fits snugly into tight corners. Small yards don’t mean small gardens—elevated mound beds can transform tight spaces into lush, productive growing areas while improving accessibility and reducing maintenance.
Whether you’re working with a 3-foot patch or a sloped backyard, these designs let you grow more without sacrificing style.
From spiral shapes that add movement to rectangular beds that maximize rows, we’ll cover the 5 best shapes for your space, plus how to build them in just 5 steps using simple materials.
You’ll also discover the top plants that thrive in elevated beds—drought-tolerant picks, fragrant herbs, and even vegetables that produce like crazy with better airflow and soil warmth. Ready to reclaim your yard with a garden that works as hard as you do?
5 Space-saving mound garden bed shapes for small yards
Small yards can still grow big gardens when you think vertically! Mound garden beds elevate your planting game by maximizing space while improving drainage and accessibility. These space-saving designs fit snugly into tight corners, patios, or even between sidewalk cracks.
The key is choosing a shape that matches your yard's layout and sunlight patterns.
I’ve designed these five mound shapes to work in compact urban spaces, each offering unique benefits. Whether you need a low-maintenance herb garden or a colorful flower display, these geometric forms make the most of limited square footage. Plus, they’re easier on your back than traditional in-ground beds!
Comparison Table: Mound Garden Bed Shapes
| Shape | Best For | Sunlight Needs | Space Efficiency | Key Feature |
|---|---|---|---|---|
| Circular | Herbs, salad greens | Full sun to partial | High (360° access) | Easy access from all sides |
| Spiral | Vertical veggies, flowers | Full sun | Moderate (compact footprint) | Guides water flow inward |
| Rectangular | Row crops, strawberries | Partial to full sun | High (long, narrow fit) | Fits tight corners |
| Triangular | Dwarf fruit trees | Full sun | Moderate (angled design) | Creates visual focal point |
| Crescent | Ornamental plants | Partial shade | High (curved edges) | Softens hard edges |
The circular mound is my go-to for urban herb gardens because it provides 360-degree access while fitting perfectly in a 3-foot diameter space. I’ve used this shape to grow basil, thyme, and parsley right outside my kitchen door—no bending required!
For vertical gardening lovers, the spiral design creates natural water channels that reduce evaporation and make irrigation easier.
If you’re working with a long, narrow space like between a fence and sidewalk, the rectangular mound is ideal. It maximizes planting depth while keeping the width manageable. I’ve seen gardeners use this shape for strawberries and lettuce, with rows that fit perfectly in 2-foot-wide beds.
The triangular mound adds architectural interest while supporting dwarf fruit trees like peaches or figs in containers.
For a softer aesthetic, the crescent-shaped mound curves beautifully around patios or along property lines. This design works well for shade-tolerant plants like ferns or hostas, adding texture without overwhelming small spaces. The curved edges also make it easier to mulch evenly and control weeds along the perimeter.
When choosing your mound shape, consider your sunlight patterns and planting goals. For example, a south-facing wall is perfect for full-sun lovers like tomatoes or peppers, while a north-facing area suits shade-tolerant plants.
I always recommend testing your space with a sunlight mapping tool before building—it saves time and heartache later!
Pro tip: Use landscape fabric under your mound to suppress weeds and improve drainage. I layer mine with compost and topsoil to create a rich planting medium that retains moisture while preventing compaction.
For extra stability, add edging stones or bricks to define the shape and keep the mound from spreading.
Remember, mound gardens aren’t just functional—they’re design statements. Play with height variations by stacking smaller mounds or adding steps for a tiered look. You can even incorporate native plants to attract pollinators while keeping maintenance low.
The possibilities are endless, and the best part? Your small yard just got a lot bigger!
Which shape will you try first? I’m partial to the spiral for my urban veggie patch, but the circular bed is a close second for its versatility. Happy planting—your green thumb will thank you! 🌱
How to build a low-maintenance mound garden bed in 5 steps
Creating a mound garden bed is one of the best ways to maximize space in small yards while improving drainage and accessibility. Unlike traditional in-ground beds, these elevated structures reduce soil compaction, prevent erosion, and even help with back pain for gardeners.
The key to a low-maintenance mound lies in proper construction and smart plant selection—let’s break it down.
Before you start, gather your tools: a shovel, wheelbarrow, landscape fabric, compost, and a level. Choose a location with at least 6 hours of sunlight daily, and avoid areas prone to water pooling.
The mound’s height should be 12-18 inches tall and 3-4 feet wide at the base for optimal stability and plant growth.
- Step 1 🌱 Mark your mound’s outline with stakes and string. Aim for a pyramid shape with a 45-degree slope for stability. Use a level to ensure evenness.
- Step 2 🪴 Lay landscape fabric over the area to block weeds. Add a 2-inch drainage layer of gravel or small rocks at the base to prevent waterlogging.
- Step 3 💧 Build the mound in three soil layers: Start with coarse material (like bark chips), then add a 6-inch layer of compost, and top with native soil. Mix in organic matter for fertility.
- Step 4 ☀️ Choose drought-tolerant plants like lavender, rosemary, or swiss chard that thrive in elevated beds. Space them based on mature size to avoid overcrowding.
- Step 5 🌿 Mulch the mound with 2-3 inches of straw or wood chips to retain moisture, suppress weeds, and regulate soil temperature. Water deeply 2-3 times per week for the first month.
One of the biggest advantages of a mound garden bed is its versatility. You can shape it into a spiral, rectangle, or even a keyhole design to fit your space.
For example, a spiral mound creates natural microclimates, allowing you to grow a wider variety of plants in one bed. Just ensure the center remains accessible for maintenance.
To keep maintenance to a minimum, group plants with similar water needs together. For instance, pair succulents with herbs like thyme to reduce irrigation frequency. Avoid heavy feeders like tomatoes unless you’re willing to fertilize regularly. Instead, opt for perennials that establish quickly and require less upkeep.
Once your mound is built, monitor the soil moisture closely during the first growing season. Elevated beds dry out faster than in-ground plots, so check the top 2 inches of soil daily in hot weather.
If the soil feels dry, water slowly at the base of plants to encourage deep root growth. Over time, your mound will become a self-sustaining ecosystem with minimal effort.
With these five steps, your low-maintenance mound garden will not only save space but also reduce back strain and improve plant health. Plus, the elevated design makes it easier to harvest and prune without bending over. Happy gardening! 🌻